If you follow me on Instagram (@hueymary), you already know this is what I woke up to on Saturday morning (April 9 - third week of spring?). This is the view (through the screen) from the ironing board in my studio.

The upside of the 5" of the lovely fresh snow was that it erased any desire to work in the garden and enabled me to focus on painting the new woodwork around the new windows in my studio.

Of course, as is true with any "simple" remodeling/construction job, one thing leads to another and it seemed pointless to paint the new window trim and not re-paint all the baseboard trim. And as long as I was going to do that, I might as well re-paint the walls since everything has to moved away from them to paint the baseboards. Definitely more work than I intended to create!!
So the work wall had to come down.
First, I had to finish piecing my blue scrappy plus quilt top . . . . . right?!?

And as long as I was doing that, I may as well take some photos and walk you through the process I used to do this efficiently. There are lots of tutorials on cutting and piecing this appealing modern block (just google "modern plus quilt pattern") to see for yourself.
My first amazing quilting teacher, Mary Ellen Hopkins, taught me to eliminate seams whenever possible to stream line the piecing process. So I chose to use 2 squares and 1 rectangle for each plus and construct the quilt top in rows. I used 3" cut strips -- cutting two 3" squares and one 3" by 8" rectangle.
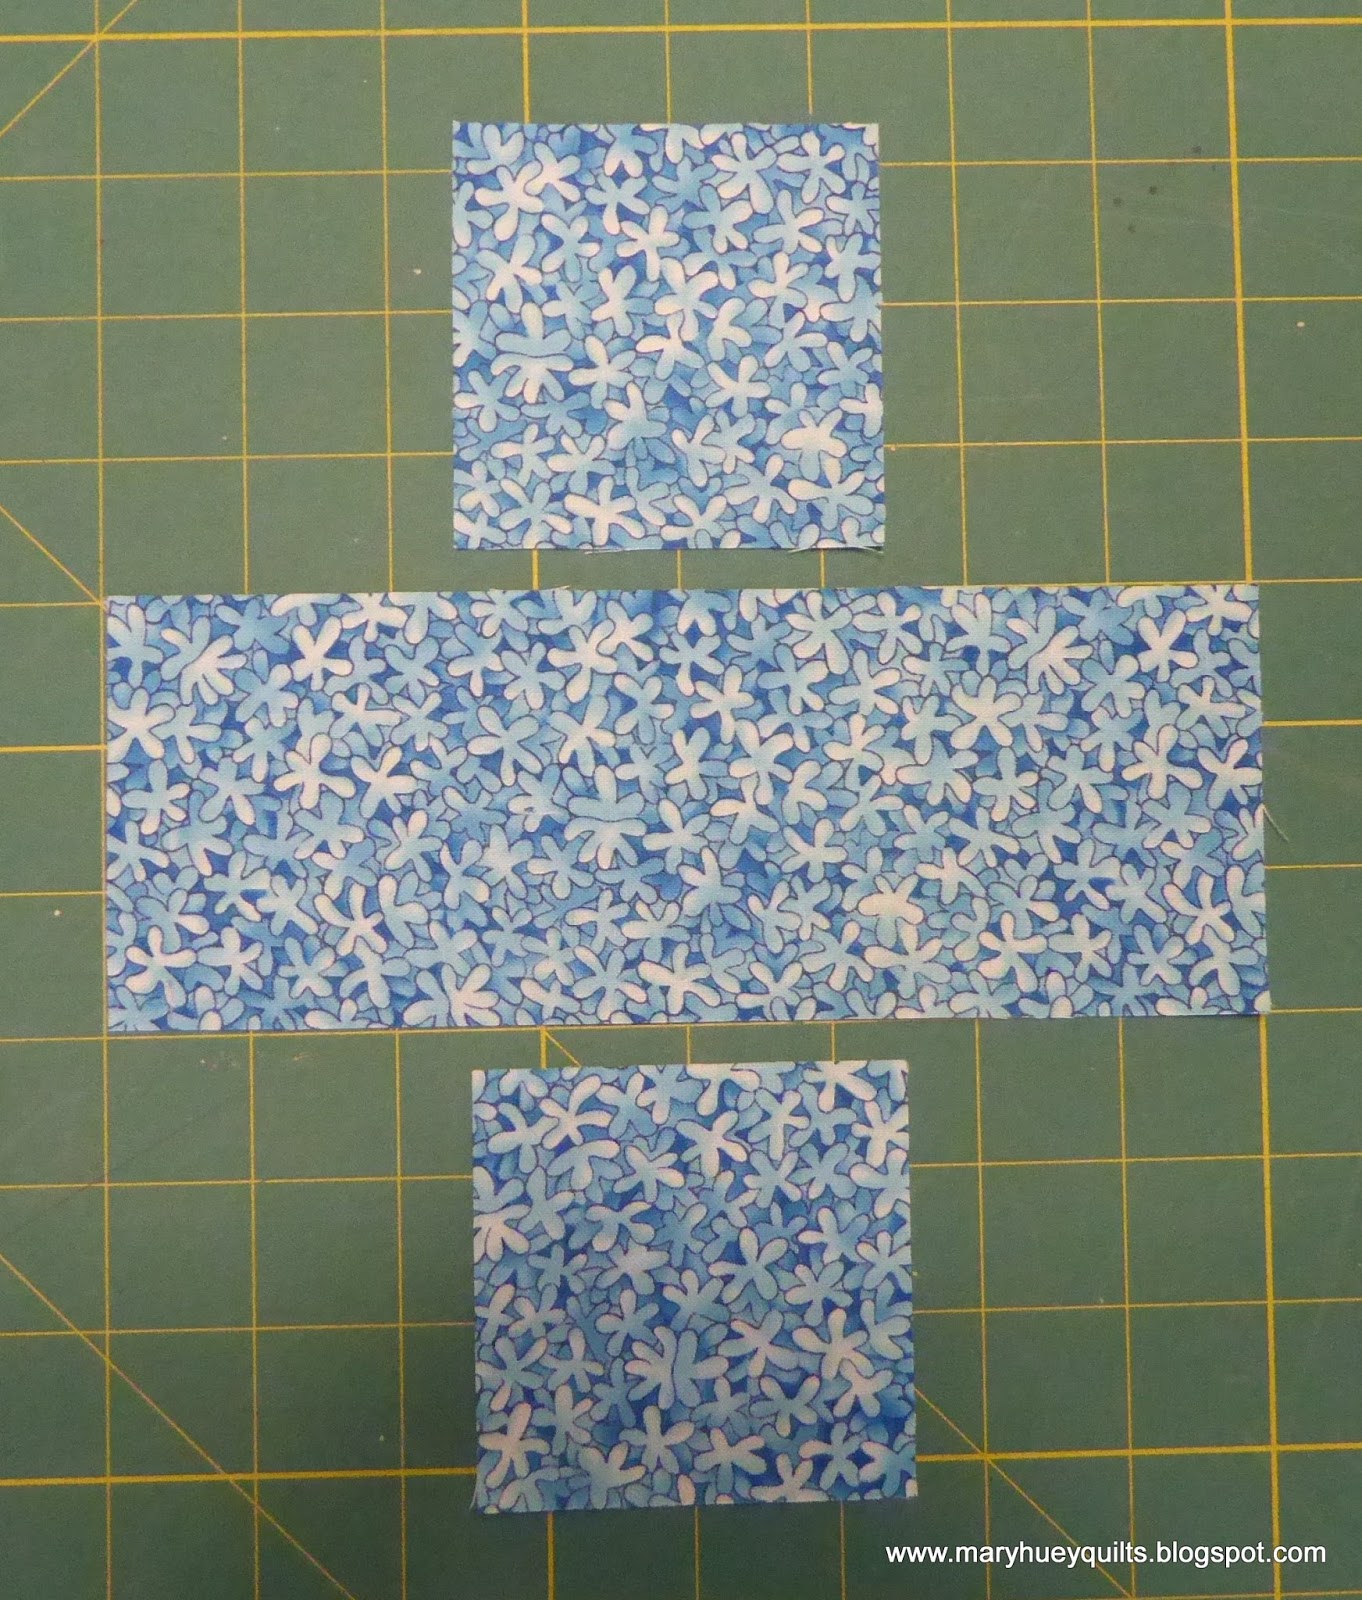
The size of the plus can be customized easily. Start by deciding on the finished size of one of the squares -- say 4 1/2". The rectangle is 3 times that length, so it would be 13 1/2". Now add the seam allowances. Cutting sizes will be 5" strips cut into two 5" squares and one 5" by 14" rectangle. Generally, the larger the quilt you want to make, the larger "plus" block you can use.
When working in rows rather than blocks, one needs to lay out the quilt -- I had about half of it on the work wall before I started stitching the rows together. I liked the results of using a wide assortment of lights, mediums, and darks and scattering them in a random order.

It only took a couple rows to realize I needed to add numbers to each row to stay organized.

The first few rows were accomplished with many trips back and forth between the work wall and the sewing machine. Finally, I found a system that allowed me to take a complete row off the work wall and to the machine in one trip. I realized that by starting at the top of the work wall and keeping the first piece on top of the stack and ending with the last piece on the bottom of the stack with all the pieces "right side up", I was able to stitch each row efficiently and without mistakes.

I worked down the stack, chain piecing pairs -- the number pinned to the first piece was a big help! Here is one row still linked with the chain stitching - the seam allowances are to the right.

To get them back into a stack for the next step without going to the work wall, I discovered than if I flipped each pair over . . . . seams on the left side of each pair . . . .

. . . . then snipped the thread chains . . .

and stacked them up from the bottom pair to the top pair, it kept everything in perfect order.

Then back to chain piecing! The first pair is opened up . . .

and the second pair right side down added and so on.

At the end of the row, sometimes there is an odd piece/pair -- no worries. It becomes the bottom of the stack for the next stage of the process.
Flipping the pairs over before restacking was the key to this process working smoothly!

Row-by-row, I worked across the quilt during the morning. There are very few seam intersections between the rows and I found that ironing the seams in the odd rows up and the even rows down worked well.

Did you notice these y-seam blocks being used as my sew-offs at the end of each stage? I'm making steady progress on getting these blocks together and you will see them before the month is out!

By lunch time, the top was together and off the work wall. Now all I need to do is make a backing, layer it, and quilt it to cross off one of my 2016 Finish-A-Long goals for this quarter!!

No more procrastinating the painting preparations!?!
The work wall came down, I sanded the baseboards and washed everything down -- the painting has begun!
Don't let the other stuff stop you from stitching!!
Mary Huey
Linking up today at Em's Scrapbag Moving It Forward Monday!
** Some of my posts contain affiliate links and if you make a purchase via one of those links, I may get a small commission. I only suggest products that I use and recommend based on my own experience. Thank you for supporting my blog!
She is a beautiful quilt, but then blues are my favorites. We also had snow in northern Indiana on Saturday and then freezing rain on Sunday. But the forecast is looking good! It actually supposed to warm up and we'll see 70* on Saturday and Sunday!!!!! What is really weird is the grass has continued to grow. I'll bundle up this afternoon and get 'er mowed. Blessings, Gretchen
ReplyDeleteI have a tendency to get blocks turned around when I am doing the final step of putting together the blocks. I need to be more careful. I will have to try your strategy to see if that works for me. Beautiful blue quilt, and yellow wall.
ReplyDeleteThanks for sharing how you put together your quilt top. I really like the colors and fabrics in yours. Thanks for sharing with Oh Scrap!
ReplyDeleteOne thing leading to another sounds like something I would do. Hilarious. But what a fresh sewing space you must have now.
ReplyDeleteSpring weather, eh?
Thats a great little tutorial you wrote there, full of great tips. Thanks for sharing! I love how all the blues play so nicely together.
ReplyDeleteA plus quilt like this is on my to do list. Your's is lovely. Enjoy your snow
ReplyDeleteBravo! Love your priorities and I'm sure your room will improve due to painting and stitching! Thank you for linking up to #scraptastictuesday
ReplyDeleteI hope your snow is gone....that is the neatest photo through the screen! It reminded me of needlepoint.
ReplyDeleteI think I am confused... Did you work in rows or columns? Did you have it pinned in a portrait or landscape orientation on your design board? Your quilt turned out beautifully!
ReplyDelete