I am D-O-N-E with the six quilts I'm giving to my children and grandchildren for Christmas!! I'll show them off to you after Christmas -- doesn't seem right to show them to the world first.
Last Thursday, Nathalie at Les Ouvrages de Nat asked me how I do my binding, by hand or machine. I do both and which I use depends on how close the "deadline" is looming.
The deadline was looming last evening!!
So this one received the full machine treatment and I took some pictures to share with you!

I use 2 1/2" wide strips folded in half cut on the crosswise grain or bias depending on the fabric (I use stripes on the bias). If I'm doing the second side by hand, I use 2 1/4" strips, but for an all-machine, I want the binding to be a bit wider on the top.
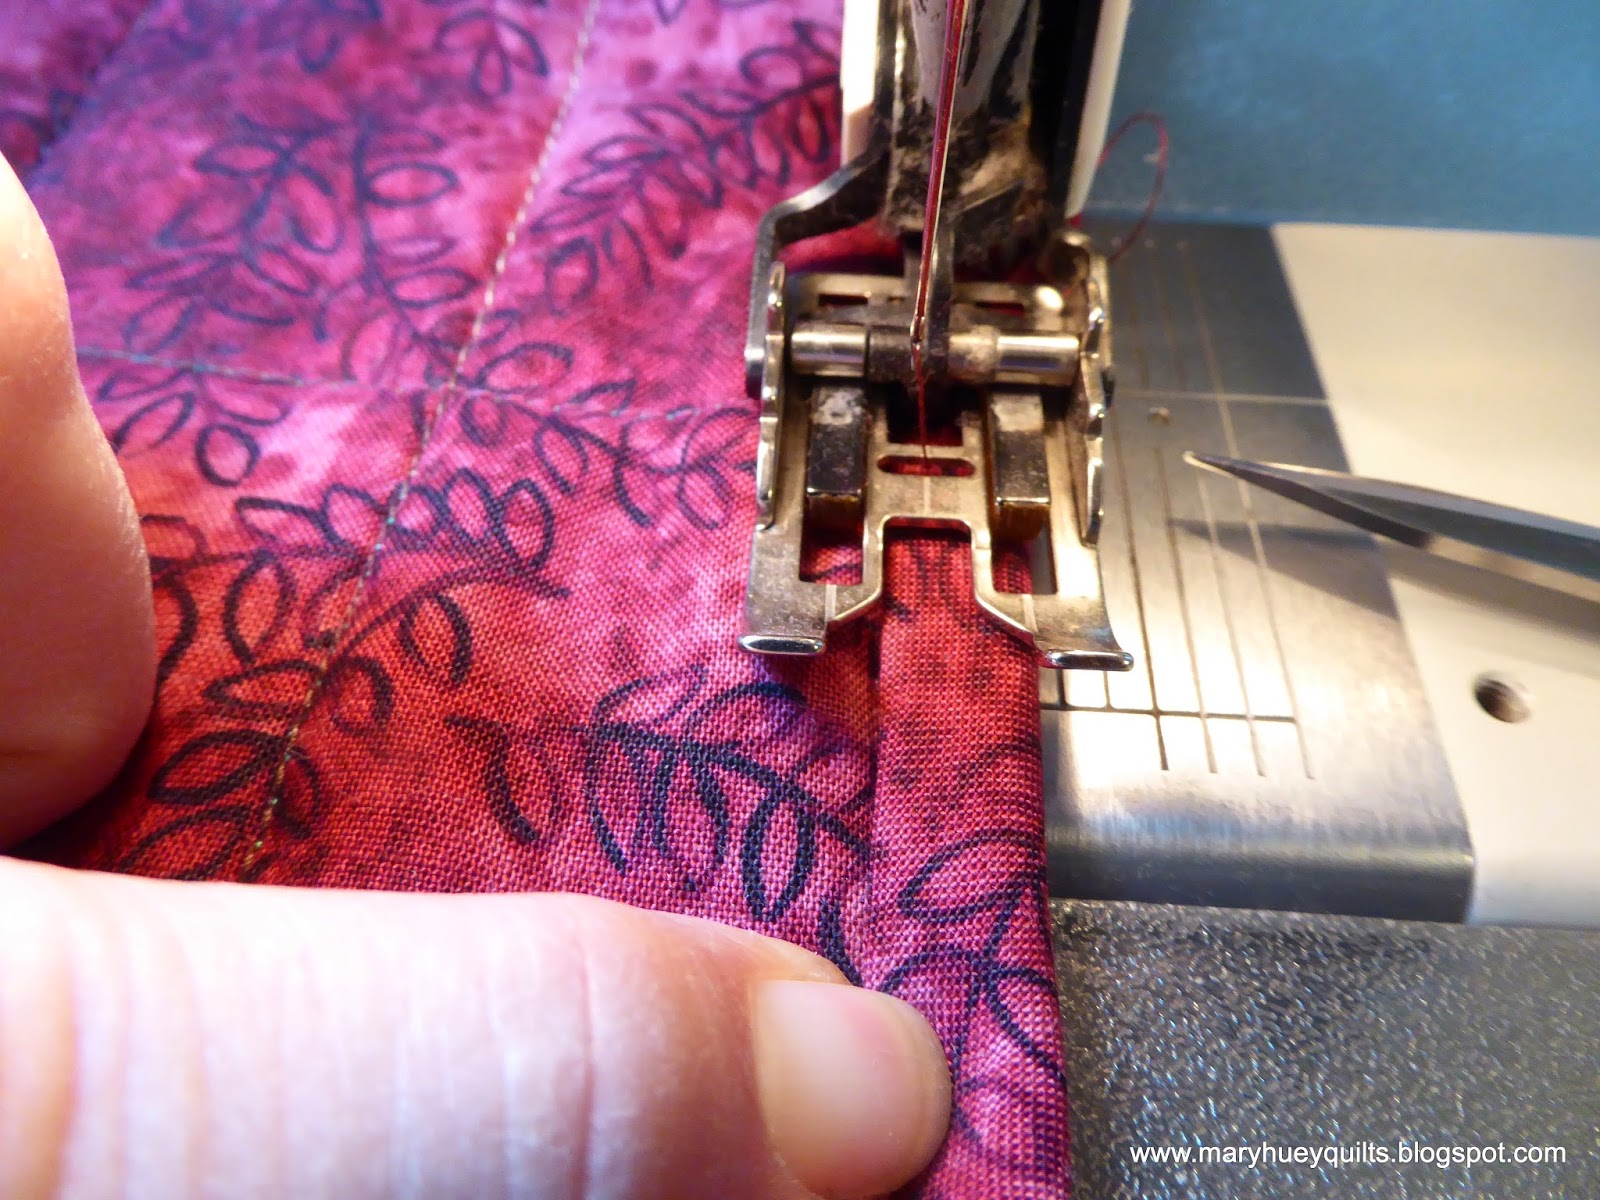
I put the walking foot on my machine and use a size 80 denim needle (because it has a sharper point).
Several years ago, I decided or realized it was easier to keep the top side of the quilt looking good if I stitched the binding to the back side first.

I push the needle position all the way to the right for this seam, taking a seam allowance that will give me a slightly wider binding on the front than on the back. You will have to experiment with the best position for your walking foot.

Before stitching the second side, I trim JUST the corners of the quilt, NOT the binding, to eliminate some bulk at the corners.

Now I move the needle to the left of center, one position -- not all the way to the left.

When I'm about 2" from a corner, I begin to organize the pivot by folding up the next edge first.

Then I fold in the binding on the edge I'm currently stitching to create the miter and secure it with a pin.

At this point, I'm taking one stitch at a time until I get to the corner. I stop with the needle down.

Now I lift the presser foot, turn the corner (don't break the thread here) and keep going. If the walking foot doesn't seem to be moving forward, just stop with the needle down. Lift the presser foot to release the back edge of the foot which can get caught hanging off the edge of the quilt behind the presser foot.

This is what I want to see on the top of the quilt when I'm finished -- an even line of stitching that is a uniform distance from the edge of the binding.

When the binding is a bit wider on the front side, the stitching on the back side falls just off the edge of the binding strip as show in the picture below. That means the thread on the top is chosen to match the binding and the bobbin thread matches the backing of the quilt.

Sometimes my stitching slips onto the binding and then I need to make a decision whether to go back and fix it or just move on to the label. Since the person who is getting this one doesn't quilt -- (-; -- I moved on!! Sometimes we have to remember that other folks can't get past the fact that we cut all this stuff up and sew it back together (really???), so they don't notice the tiny defects that often intimidate us into downgrading our work.

This is a large laprobe (56" by 78") and the binding was finished in one hour -- it may take you longer the first time you try it but I've been doing this for 15 years so I'm fast.
Hooray, there will be no unfinished Christmas gifts this year (even though my children will miss them).
Thanks to all of you who have started reading and following for helping me grow my blog this year -- I'm enjoying all the sharing and exchange involved in being a "blogger"!
Merry Christmas!!
Mary Huey
GREAT tutorial ! Thanks ! I will try it ! :-)
ReplyDeleteThanks, Nat!!
DeleteI've always been bad at this but will give it a try with your tips...merry christmas!
ReplyDeleteThanks, Monica -- give it a couple tries!!
DeleteCongrats for finishing all your gifts with a few days to spare! I'll refer back to your tutorial for my next baby quilt. Merry Christmas!
ReplyDeleteThanks, Lin and Merry Christmas to you and your family!
DeleteI'm lagging behind you with finishing gifts, but this very clear explanation of binding by machine will really help! Thanks for explaining the needle positions you use and showing clear photos along the way. I've learned a bunch from you this year, Mary! Happy Holidays!
ReplyDeleteMerry Christmas to you Tammy and thanks for being a "follower"!!
DeleteThanks for showing your process. I think I might be able to do thisQ
ReplyDeleteYou are welcome, Libby! Try it on a small piece -- took me a couple tries to get the needle positions just right for my walking foot.
DeleteYou make it look easy enough to give its try. Thanks for your tut.
ReplyDeleteHope it works for you, too!!
DeleteI spent my morning yesterday sewing binding on a queen size quilt and have to admit it didn't come out this nice. LOL!! I usually hand sew binding but didn't want to spend my hand stitiching time, sewing all that binding down. THanks for the hints!!
ReplyDeleteThanks for stopping by Val -- hope my ideas will be helpful to you on future bindings!
DeleteJustfound your blog! and I love this tutorial thanks--what a neat Christmas present seeing I have just quilted two quilts...hugs, Julierose
ReplyDeleteThanks for visiting, Julierose!!
DeleteUntil today I did all binding by hand... and I love that, it is like a last journey around your project before it is finished or you give it away... Today I made a fast Christmas tabletopper and did the binding completely with my machine to finish fast. And it worked very well. Merry Christmas! Kind regards, Annett
ReplyDeleteHappy New Year, Annett -- I still like a hand done binding best, but there are times . . . .
DeleteGreat binding tutorial. Moving the needle over is such a good tip! Thanks, and Merry Christmas!
ReplyDeleteHappy New Year, Sharon -- glad you enjoyed the tutorial!
DeleteYou do a nice machine binding. I can never get them to look good so I always do it by hand. That is ok though because I love hand work.
ReplyDeleteI've done lots of charity quilts with this machine binding and you know what they say -- practice improves!!
DeleteI am a french reader of Les ouvrages de Nat. Thank you so much for your useful way of biding. I'll try it soon.
ReplyDeleteBest wishes
thanks for visiting, Marie -- hope it made sense and you'll be able to make use of my tips!
Delete