Did that title get your attention?
No UFO's?
Not possible, is it?
Since I'm leaning towards a 2018 goal to finish up/eliminate my most ancient UFO's, it seems like a good sub-goal is not to create any new UFO's as well.
As I shared with you a week ago, I played along with the #xmasfussycuttingsewalong on Instagram and as I finished each hexie flower, I put them up on my design wall which is directly across from my sewing machine so I see it every time I look up.

As the collection grew, I began to envision a new tablerunner for the side table in my dining room.
I selected four of my hexie flowers and added 28 full and 14 half hexagons of background fabric to make this version. Half-hexies straighten the edges effortlessly and guarantee most of the outer edges are all straight of grain making the binding process easier.
Because I chain piece through y-seams, I divided the runner into three sections so that I could work on all of them simultaneously. This is one of the two end sections and the third section was the center of the runner.

While working through the final seams to join the three sections, I needed something else as my sew-offs between the individual seams to keep the chain-piecing momentum going.

So this began to happen -- adding diamonds to the other hexie flowers I pieced during the sew-along. These will become sets of hotpads for little gifts.

One of the beauties of working with Marti Michell's templates sets is that the right shape in the right size is right at my fingertips! H53 is the diamond that fits the H52A hexagon.
Note: I used H52E to cut the half hexagons for the edges of the piece.

It didn't take long to chop up the scraps and miss-cuts from the tablerunner background into diamonds.
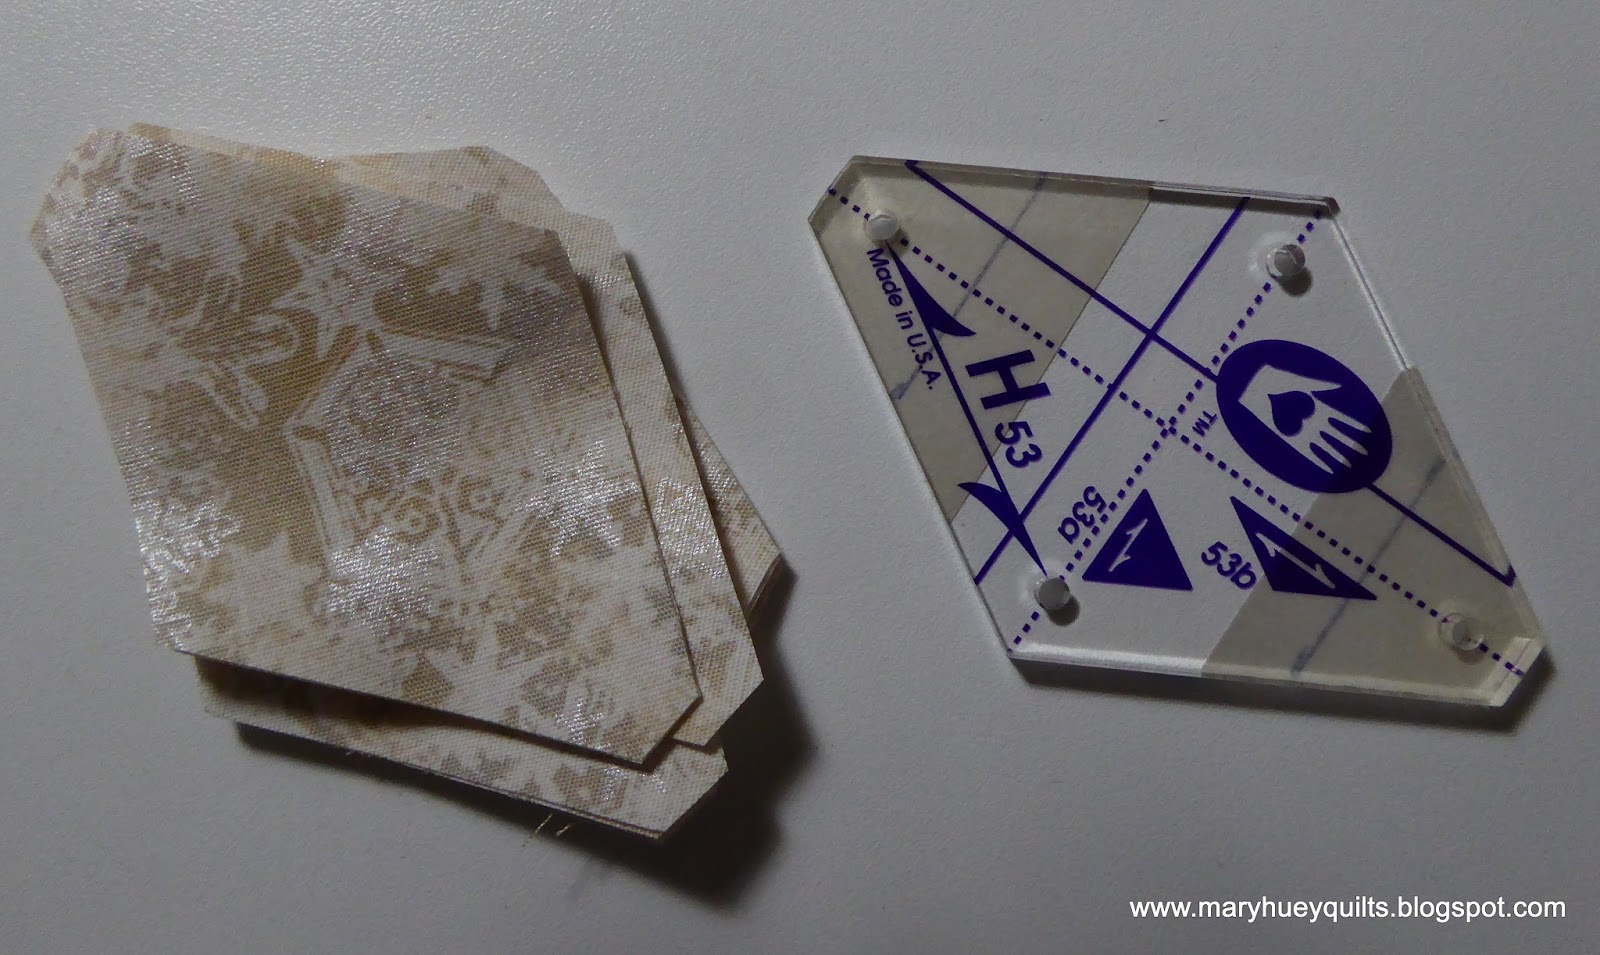
But you can't shortcut the cutting and leave the points on these diamonds.

Those trims which just take a moment enable perfect quick matching.

The rhythm of moving from one y-seam to the next has become second nature for me after 5 years of using the Set-In Piecing Simplified technique.
Off of the runner's seam, onto the hotpad's seam.

And as Bonnie Hunter points out so frequently, chain piecing is an efficient strategy for taming some old UFO's or creating monotonous units for a future quilt.

Here's a strategy from my Set-In Piecing Simplified workshops.
When zigzaging along a long row of short y-seams, skip one and stitch the next one.

Now the unfinished seam between is easier to align -- grab both ends of the unstitched seams, lift the piece a bit to shake down all the surrounding patchwork, align the corners and it's ready to stitch!
So I wrestle a bit with one seam and then the next is a snap!

With the top finished and a lunch gathering for 16 hungry birding friends on the calendar for Saturday, I embraced the opportunity to finish the runner (instead of tidying up the living room). A quick rummage in the stash found a backing fabric and binding, some batting scraps, and a spool of gold metallic thread!

I kept the quilting simple -- edge to edge straight lines -- so I can use the walking foot and not have to tie off too many threads.

The exception was the six-pointed stars stitched in the gold center hexagons.

And I could not stitch through the chickadee!

The 60 degree corners are treated much the same as a 90 degree corner for the binding.
Stop stitching at the corner. Take the piece out from under the presser foot. Fold the binding off the corner to make a straight line with the next side.

Bring the binding strip back onto the quilted piece. Notice the fold doesn't align with the edge of the piece.

Here's another view after I stitched it down. Those two edges by my finger need to be perfectly aligned with each other.

And here's the back -- hard to see my little miter but it's there.

And here's the finished piece!! It's 18" by 27".

Those 30's flowers I'm making with kites would also work in this layout.

I sketched a longer layout to share with you in Electric Quilt (still working with #5, really need to update). I inserted the dark lines on the right end to illustrated how to shape the end -- did that in Paint.

I used 1 1/2" hexagons for my flowers so the layout above would be 18" by 39". Since I wasn't inspired with using all my hexie flowers in the same piece, I shortened it which suits the length of the table better. If one was using 1" hexagons, this layout would finish at 12" by 26". To make the runner longer, add groups of three more hexie flowers. Using 1" hexies would extend it 9" for each set of three and using 1 1/2" hexies would extend the length 13" for each new set.
Curious about all the ins and outs of chain piecing y-seams -- click on my face up there at the top of the right side column to go to my Etsy shop and order Set-In Piecing Simplified!!
The rest of my hexie flowers are piled up on the sewing table for a snowy afternoon of finishing.

But now I have really have to go tidy up the house for tomorrow's lunch gathering!
Enjoy your weekend!!
Mary
Thanks for sharing your tips on making hexies. One day, I will be brave enough to make them!
ReplyDeleteThat tip about skipping seams. . ..SO GENIOUS!! I think I need to start a new quilt now, just for the excuse to try it!!
ReplyDeleteSo clever and so cute. Thanks so much for the process post.
ReplyDeleteMerry Christmas
I love the IDEA of no UFOs, but I know it is beyond my will power. Instead, I am happily trying to finish as many as I can in this quiet period between Christmas and New Year. If I can just tame the pile a little ...
ReplyDelete