After several months of cutting and piecing the Rose Star block and several workshops helping students through the process, I decided to try a new strategy for the cutting. It was apparent that the fabric decisions for this block are the real challenge and it's not unusual to re-cut some or all of the pieces several times before settling on a combination that I like.
Last week, I followed through with a scheduled workshop even though it was below my minimum number of students so I could test a new approach to the cutting. I joined with my students in the cutting process and am happy to share the results with you today!
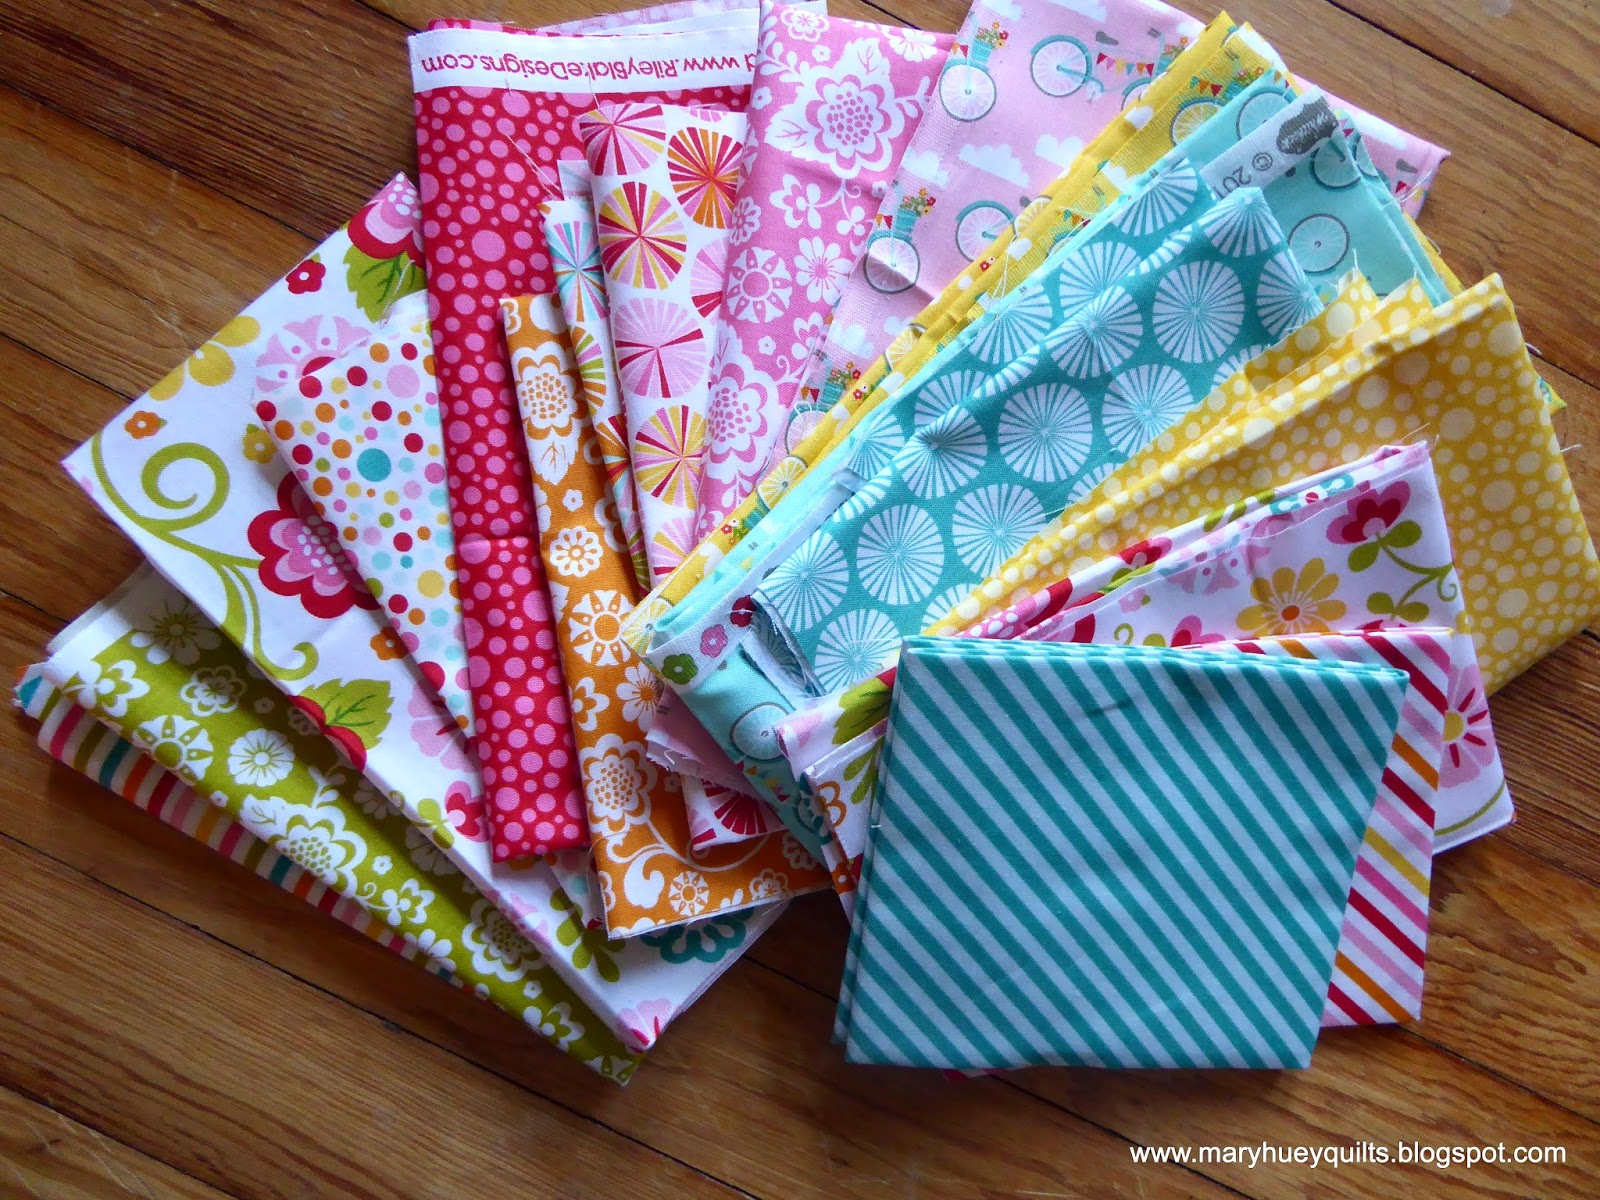
I've had a fat quarter stack from Riley Blake on my "sacred" shelf for about a year. On the way out the door I grabbed it for my first trial run of the idea.
Each of us began by cutting six kites and six crowns from most of the fabrics we brought. We used Marti Michell's new Kite and Crown Template sets.
I set aside the directional prints and stripes.

These are the two basic shapes used in this block and at least six of each are needed in every block. As the block layout process begins, you might need more kites but it's easy to cut those as needed.

The center of each block can start with a hexagon, three crowns, or six kites. I used one of the directional prints in the assortment to cut three crowns for each center -- looks like a bicycle-go-round doesn't it?

The second round (my turquoise pieces above) can be six crowns or twelve kites.
The final round is a combination of kites to make equilateral (60 degree) triangles that alternate with crowns. Here you see my two auditioning options.

The yellow green sits back and the turquoise print comes forward. With them laid in both positions, it easier to decide which I like better. Do I want the points of the star to stand out (on the left side) and the crowns to site back or vice versa (on the right side)?
It's almost like playing cards -- just deal out the pieces and change what you don't like and keep what you do. Be ready for the happy accidents and cut a few more pieces when needed.

And so I played with combinations, moving pieces around, taking photos (gotta love that phone!!) until I was happy with each combination.

No right or wrong -- just personal preference!!

As we worked, one of the gals remarked while it felt random at first, it helped her get a better feel for how to proceed and I would echo that. I began by laying out three blocks -- once I was happy with those, I turned to the leftover kites and crowns and began to add the stripes.
I forgot to bring my auditioning set of mirrors but I know that laying the kite template on a stripe this way gives good results. There are two layers of the stripe, wrong sides together in this photo. Since it's an uneven stripe (in the way the colors appear), cutting this way gives me "rights" and "lefts" and make it easier to manage the designs created with it.

Pairing the kites together creates a crown and won't this be a great star around the center hexagon?

Because I cut to manage the uneven stripe, I know I'll get perfect chevrons wherever I use the kites. And if they don't work in one of these two positions, they can be used as the points of the star.

I didn't stitch any of them together yet (need to cut the background pieces), but I left with six stars designed and ready. The students left with a block pieced and 3 to 5 more planned. I noticed they were a lot less exhausted at the end of class, too. I think it's because, we took a playful, intuitive approach to the fabric rather than trying to "visual" how each piece would look cut for a specific fabric, cutting it, laying it out, not liking it, having to cut some more. . . .
This idea can be applied to any multi-fabric set of blocks, not just Rose Star, but it feels like a winning approach to me and so this will be my strategy in the future (I think). I'm teaching the workshop again at the end of the week, so will test it and then decide for sure.
What do you think?
Mary Huey
What pretty blocks! That cutting strategy sounds like my way of doing things!! Loved your bug quilt also! Dianne
ReplyDeleteThanks, Dianne -- it certainly was fun!!
DeleteI haven't seen this block before - well you be hand piecing this or machine piecing. It looks like something I would be hand piecing.
ReplyDeleteThanks for stopping by!! I machine piece it, Karen -- it's a great application of the chain-piecing strategy for y-seams featured in my DVD, Set-in Piecing Simplified. But it certainly can be hand-pieced. The gals at Material Obsession do it EPP and a friend recently found an article from 1996 in Traditional Quiltworks magazine that featured it as well. I will say if you have learned to do y-seams, it's a simple block to piece -- much easier than it appears.
DeleteThose blocks are so, so pretty! I just love them. Now if only I could find the time and develop the patience to actually make one!!!! But I sure love seeing yours...inspiring!
ReplyDeleteThe blocks are simply stunning!
ReplyDeleteLove the blocks and so much fun! The combinations are endless! I would love to see it finished!
ReplyDeleteMe, too -- LOL!
DeleteI think you are fabulous
ReplyDeleteHi Mary - great demonstration. I too like to cut many pieces and then play around with the shapes until I come up with unexpected combinations that work! When what I've got left doesn't work together I just cut more patches. It is a great way to learn about colour, value and scale.
ReplyDeleteGorgeous! gorgeous! Gorgeous! I love them all but the striped one will be stunning.
ReplyDelete